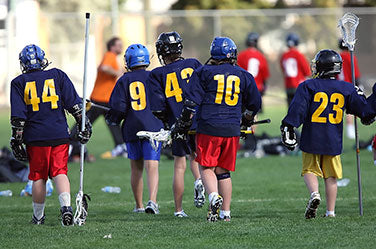
fix jersey numbers

How to Iron Numbers on a Jersey or Fix Peeling Numbers

Maintaining your sports jerseys can take a lot of work. After hours out in the sun, mud, and grass, pieces of the jersey can begin to fall apart or deteriorate, which can lead to an unprofessional, or unkempt look for the team. Knowing how to properly repair your jersey to keep it looking as best as possible is a great way to show your commitment to a team and to show that you truly care about how you represent the team and its members. We’ve all had jerseys with those plastic letters on the back of them. Either they were ironed on by a parent or came pre-installed from the jersey supplier, but it’s always just a matter of time until the numbers slowly start to peel off or crack and need replacing. If you’re unfamiliar with the process of installing new plastic numbers on to a jersey, or replacing/repairing old ones, it’s fairly straight forward, but if don’t incorrectly you could damage the numbers and/or the jersey itself. The process for installing new numbers vs. repairing old ones is almost the same, it’s just the beginning steps that will be slightly different.

Repairing / Installing New Plastic Numbers on a Jersey

Things You Will Need

Whether you’re installing new numbers on to a jersey or shirt, or repairing damaged numbers on an existing jersey, there are a few things you’ll need in order to complete the process.
  • Iron
  • Piece of White Paper
  • Ironing Board (or something hard and flat)
  • Jersey
If you’re looking to add new numbers to a jersey you’ll also need the new numbers you’d like to add to the jersey.

How to Start

  1. Wash the Jersey
The first thing you need to do before attempting to do anything with the jersey is to make sure it’s as clean as possible. We recommend turning the jersey inside out (if it’s a number repair) and running it through a wash cycle in the washing machine and then letting the jersey hang dry. By washing it inside out you’re ensuring that you don’t damage the already damaged numbers even more, or ruin any of the other decals or patches that may be on the jersey. We always recommend washing jerseys inside out for this exact reason.
  1. Prep Your Space For Repair
After the jersey is clean and free from any debris, you’re going to want to get setup for the repair. The first thing to do is make sure that the jersey is now right-side out (instead of inside out that we had during the wash cycle). Next, take the ironing board, or the cardboard, and place it in the middle of the shirt, so that the flat part rests underneath the numbers between the front and back of the shirt. This will give you a nice flat surface to work on and will ensure that the numbers adhere as flat as possible.
  1. Align Numbers Properly
Next you want to make sure that the numbers line up exactly how you want them to look on the back of the jersey. There’s not an easy way to remove and readjust the numbers once you apply the iron, so make sure everything looks perfect before moving on to the next step.
  1. Place a White Piece of Paper Over the Numbers
Before we start using the iron, you want to make sure to have a plain white piece of paper available that you can place on top of the numbers. This piece of paper will act as a barrier between the iron and the numbers so that you don’t accidently melt anything or ruin the numbers. They are made of a plastic material and won’t do well with extreme heat applied directly on to them.
  1. Let the Iron do the Work
Once everything is setup how you want it, on the jersey, grab your iron and turn it on to the NO STEAM setting. You don’t want to use steam on the jersey, you just want the heat. The steam could damage the jersey, so be sure you’re not using that setting while going over the numbers. With the iron heated up, you’re going to want to place it on the piece of paper and continuously move it around the number for a little bit. This will heat up the number and allow it to stick back to the jersey. Be careful not to move the iron off of the piece of paper or you will melt your jersey, and that’s not something we can help you repair. We suggest focusing on one number at a time and when you think the number is adhered enough, gently peel back the piece of paper to check. If you notice that there are some corners, or other areas, that aren’t quite adhered yet, move your piece of paper to that area and focus specifically on those spots. Once you’ve completed one number, move on to the next and repeat the process. Peeling jersey numbers don’t need to require a full replacement of the jersey. As long as you’re patient and prepared, you can easily repair the numbers yourselves without having to rely on professional help. There’s nothing worse than a jersey that has the numbers peeling off the back, and now you know how to fix it should you ever run into this problem.
Back to blog

Leave a comment

Please note, comments need to be approved before they are published.