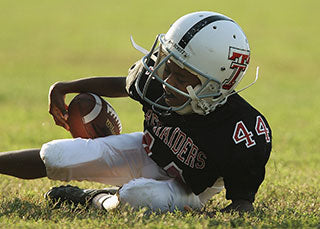
Installing decals and stickers can be a challenge. Whether you’re looking to stick them on your
football helmet or your car, the worst thing that can happen, aside from the decal ripping, is for you to end up with unsightly bubbles throughout the design.
It takes a steady hand and proper understanding of how to install these decals to ensure that you minimize or eliminate any bubbling that may occur before the decal sets.
Depending on the decal you’re using, these bubbles may not be as noticeable in the long run, but I know if I installed a sticker that was full of air bubbles, it would bother me even if it didn’t bother anyone else.
There are a number of things you can do to help prevent or remove air bubbles that may pop up when installing your decals or stickers. Proper preparation and patients are going to save you a lot of headaches after the fact, so let’s take a look at what you can do to ensure that your decal comes out smooth and perfect the first time.
How to Prevent and Remove Air Bubbles from Vinyl Stickers
There are a few different methods you can use to help remove air bubbles from your stickers or decals, but the key is to catch these bubbles early. While it is possible to remove them after the sticker has fully set, it can be more difficult depending on how long the sticker has been on the surface for.
1. Preparation is Key
The best way to avoid air bubbles, as well as bubbling from dirt and grime, is to make sure you clean the area completely before applying the sticker.
You’ll want to wash the area where you are going to apply the sticker with a 50/50 mixture of either soap and water or rubbing alcohol (70% isopropyl) and water. This will ensure that the area is as clean as it can possibly be. Bubbling can also occur from small imperfections, dirt, or other raised grime that may be on the surface, so it’s important to remove all of these elements before applying the decal.
We suggest avoiding window cleaning products as the can leave a residue behind that may cause your decal not to adhere as well.
After you’ve cleaned the surface, be sure to wipe it down with a soft cloth. If you want to use the “wet method” of installation, you can get a spray bottle with 5% soap and 95% water, spray the surface a bit and then apply the decal while rubbing out the water with a flat squeegee. This method works best on larger decals.
2. Install Your Decal With Patience
The easiest way to prevent air bubbles in your stickers is to install them correctly the first time. When installing them you’ll want to make sure that the area is clean, as we outlined in step 1 above, and then you’ll want to peel off a corner of the decal backing, stick it in place, and then using a flat squeegee, or plastic tool, slowly work your way to the other side of the decal while slowly pulling off the backing at the same time.
This will help prevent any bubbling as you go, and will prevent you from having to work any bubbles out after the fact.
3. Remove the Bubbles Using a Squeegee or Flat Plastic Tool
Once the decal is in place, if you notice that you have some bubbles that you need to get rid of, the easiest way is to take a squeegee, or a flat plastic tool (a credit card would even work), and slowly push on the bubbles and work them towards the edge of the stickers.
This technique will be most effective if you’re using the wet method of installation that we mentioned above, but with time and effort it can also work when the surface is dry.
If you’re having trouble working the bubbles to the edge, you can also take a very small pin and pop the bubbles, and then use the plastic tool/squeegee to help flatten out the areas. The pin hole should be so small that once you smooth out the decal you won’t be able to notice the pin hole itself.
4. Use a Hair Dryer
The final method that works well when trying to remove bubbles from stickers is to use a hair dryer.
Set your hair dryer to low and hold it a few inches from the decal and the bubbles should start to flatten. If they don’t, you can use your squeegee or credit card to then start working the bubbles towards the edge of the decal.
The heat from the hair dryer will help loosen up the adhesive on the back of the decal making it easier for you to move the air bubble around and push it towards the edge to remove it.
These are the most effective ways to remove air bubbles from your decals after you’ve installed them. However, if you notice a bubble in your decal due to a piece of dirt underneath the sticker, unfortunately the only way to remove that without damaging the sticker is to slowly peel the sticker up and remove the dirt underneath.
There’s nothing quite like a perfectly installed, smooth,
helmet decal when out there on the field. A bubble filled decal can make you and your team look unprofessional or unorganized, and that’s not the impression you want to give off.
Take your time when applying your decals and don’t rush.


